Engineering Case Study
Custom Shoulder-Mounted “Max” Prop: From CAD Concept to Wearable Light-Up Cosplay Piece
Project Overview
This project was a custom shoulder-mounted “Max” prop inspired by Flight of the Navigator. The goal was to create a wearable, battery-powered cosplay accessory that could sit on the shoulder, light up from the front, and visually read as a polished sci-fi device rather than a simple static 3D print.
At the start, the commission seemed straightforward: model the object, print it, paint it, add illumination, and provide a way for the client to mount it to their costume. In practice, the project became a full design and engineering challenge involving CAD modeling, print strategy, surface finishing, lens diffusion, electronics integration, weight management, and wearable mounting.
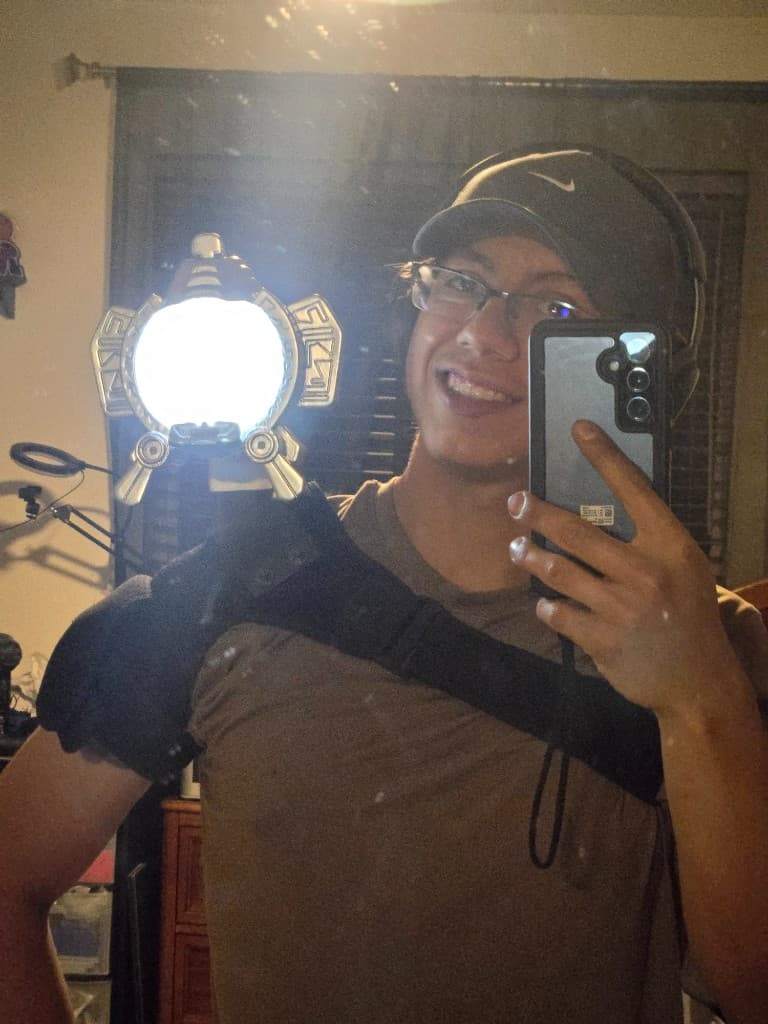
The final piece included a 3D-printed body, metallic silver finish, diffused illuminated front lens, internal LED and battery power system, and a shoulder support system designed to stabilize the prop while worn.
Project Goals
The main goals for this build were:
- Create a recognizable shoulder-mounted prop based on the client’s reference.
- Design the form in CAD with enough mechanical structure to hold electronics and mounting hardware.
- Add a front lighting effect that looked intentional and diffused rather than like an exposed LED.
- Make the prop wearable on the shoulder without excessive forward tilt or rotation.
- Finish the surface so it looked like a metallic sci-fi prop rather than raw 3D-printed plastic.
- Keep the final piece practical enough for cosplay use at a convention.
The most difficult part ended up being the last two goals: making the finish look convincing and making the prop stable enough to wear.
Initial Design Direction
The first stage was interpreting the reference into a manufacturable 3D model. Because the prop needed to be printed, assembled, painted, and worn, I could not simply copy the visual shape. The model had to be broken down into realistic printable components with enough internal room for lighting, wiring, a lens, and attachment hardware.
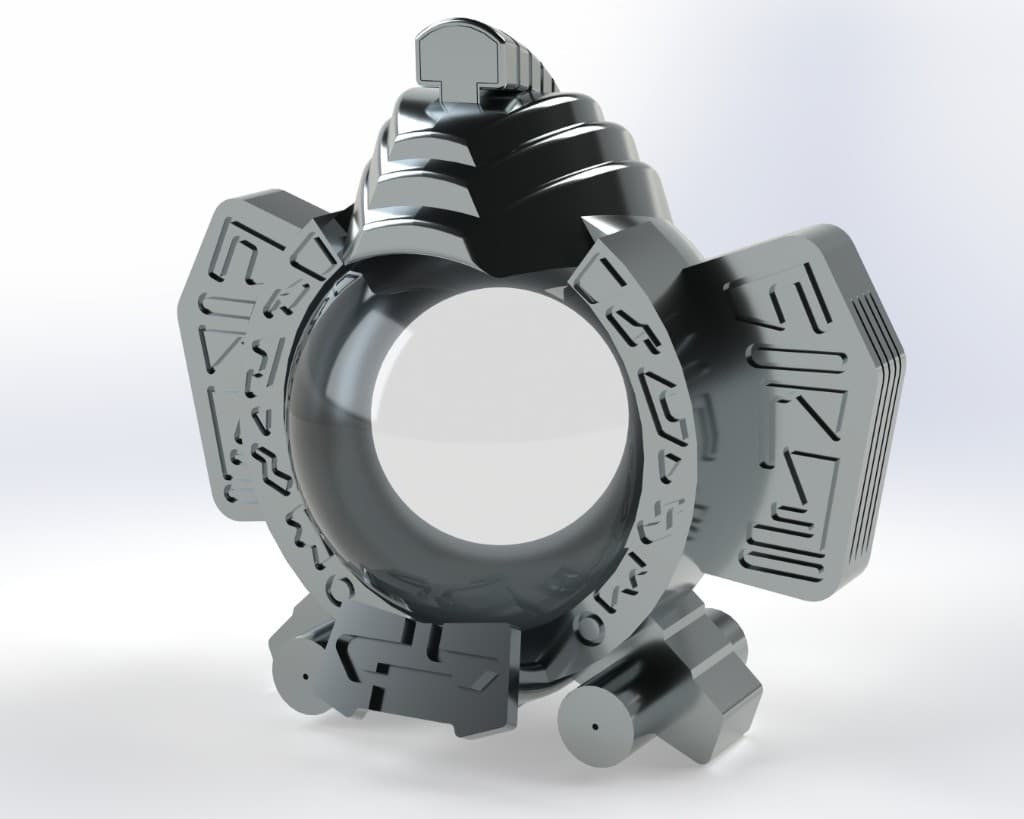
I designed the body around a large circular front opening, side fins, lower detail elements, and a rear arm intended to connect to a shoulder support. The design also included space for power and mounting features such as screw holes and access points.
One of the major early decisions was to separate the prop into sections so that each part could be printed cleanly and finished more easily. The main body, front ring, side details, rear arm, and shoulder support components all had to work together as one visual object while still being practical to fabricate.
CAD Modeling and Mechanical Layout
The CAD phase focused on balancing three priorities: visual accuracy, printability, and physical integration. The front ring was designed to hold a lens or diffuser while leaving enough depth behind it for the lighting system. Decorative raised and recessed details were modeled into the front face and side fins to give the piece a layered mechanical look. The rear arm was designed as the primary connection point to the shoulder mount.
The design also needed to account for real-world assembly. I included flat faces and screw locations where possible, since relying only on glue would make future maintenance or adjustments more difficult. The overall geometry had to be strong enough to survive handling but not so thick that it became impossibly heavy.
The rear arm became one of the most important mechanical features. It visually matched the reference direction, but it also created a long lever arm. That meant once the prop was mounted, the weight of the front body naturally wanted to rotate forward. This became a major lesson later in the build.
3D Printing Strategy
The parts were printed in PLA using settings chosen to balance surface quality, strength, and weight. Because the piece needed to be wearable, I wanted to avoid unnecessary mass. At the same time, the prop needed enough wall thickness to survive sanding, filler, handling, and mounting loads.
For this type of decorative wearable prop, the outer walls mattered more than high infill. A dense infill would have made the part heavier without significantly improving the areas that actually needed strength. The stronger approach was to use reasonable wall thickness and moderate infill while reinforcing specific attachment zones.
The print settings were selected around:
- Moderate layer height for a balance of speed and detail.
- Multiple walls for stronger surfaces and cleaner sanding.
- Controlled infill to avoid adding unnecessary weight.
- Supports only where needed to preserve detail and reduce cleanup.
The print process also revealed that some surfaces were going to require heavy finishing. Curved parts, especially the large body shell and front ring, showed visible layer lines and minor imperfections that became much more obvious during paint testing.
First Assembly and Fit Check
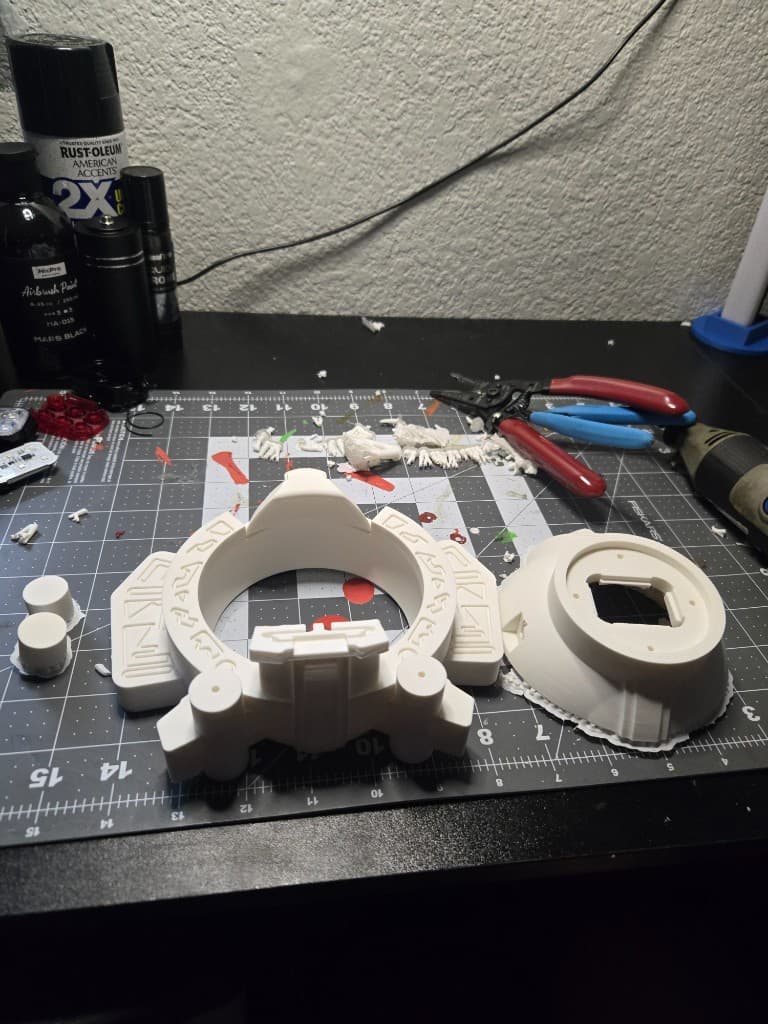
After printing, I dry-fit the main body components to check the overall scale, alignment, and mounting concept. This stage was important because it showed that the general silhouette was working. The prop looked recognizable and the major parts aligned well enough to move forward.
However, the first physical assembly also made the biggest issue obvious: the prop was heavier than expected. The main body was not just a small decorative accessory. Once the lens, electronics, paint, hardware, and shoulder support were added, the final weight was going to matter.
This changed the project from a simple prop build into a wearable mechanical design problem.
Surface Preparation and Finishing Challenges
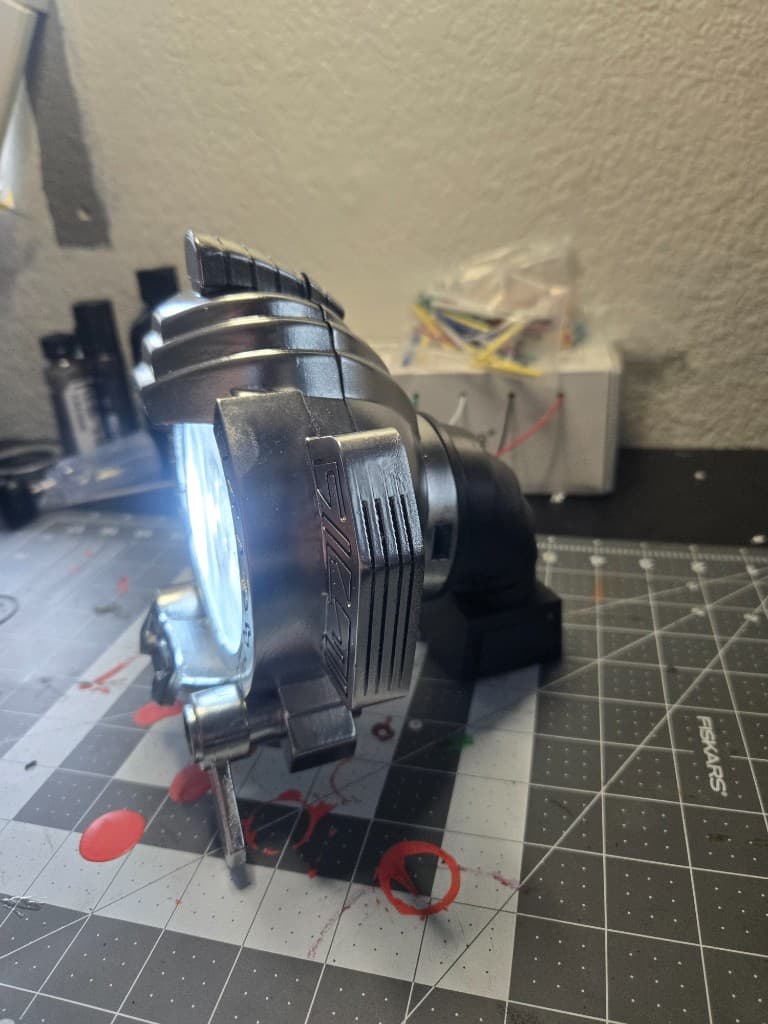
The finishing stage was the most frustrating part of the project. The original goal was to create a chrome-like metallic finish. In theory, a mirror chrome finish would match the shiny sci-fi look of the reference. In practice, chrome paint is extremely unforgiving.
Chrome-style spray finishes reveal every scratch, seam, layer line, sanding mark, and uneven filler spot. Any flaw in the base surface becomes more visible once the metallic layer is applied. On top of that, some chrome finishes are fragile, difficult to clear coat, and prone to dulling or reacting with previous paint layers.
Several issues appeared during finishing:
- Filler primer cracked over unstable paint and putty layers.
- Sanded gloss black lost its shine and made the chrome less reflective.
- Chrome highlighted surface imperfections instead of hiding them.
- Small chips and smears became visually distracting during close inspection.
- The finish looked different under every lighting condition.
Eventually, I shifted away from chasing a perfect mirror chrome and moved toward a more reliable metallic silver finish. This was a better choice for an actual wearable prop. Instead of trying to make it look like flawless polished metal, the final goal became a clean, cast-metal sci-fi finish that would hold up better and look more consistent.
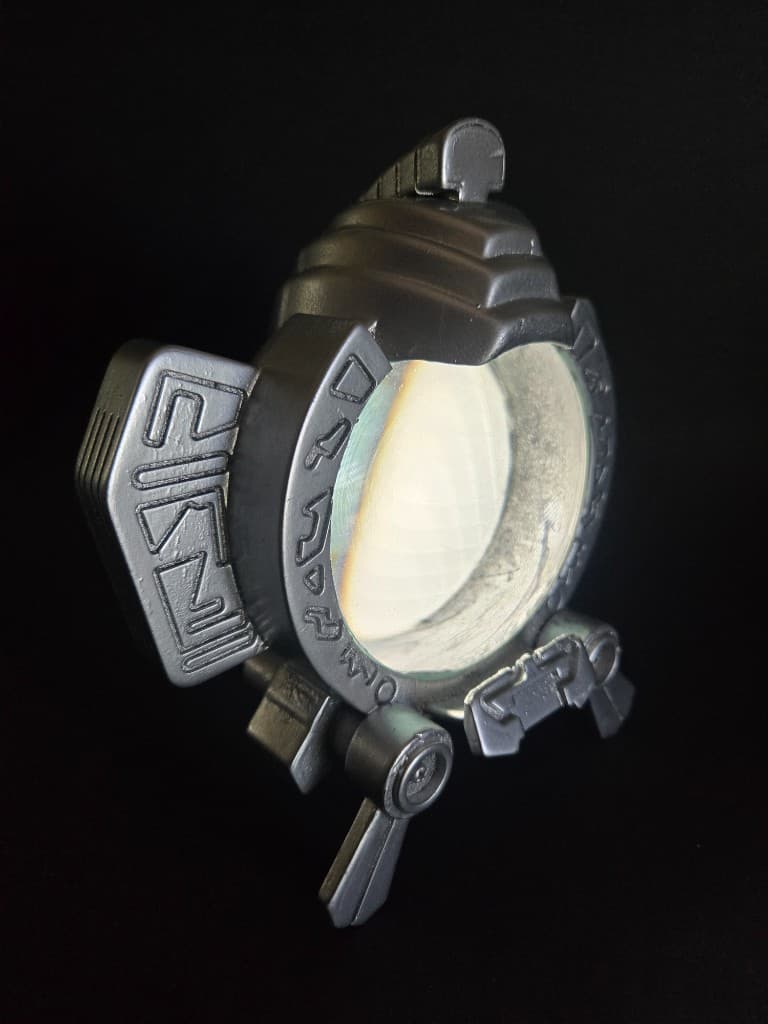
Lesson Learned: Chrome Is Not a Shortcut
One of the biggest takeaways from this project was that chrome paint is not a shortcut to a professional finish. It requires a nearly perfect base. If the surface underneath is not smooth, stable, and fully cured, the chrome will make the flaws more obvious.
For future projects, I would only use chrome-style paint on small accent pieces or on parts with very controlled prep. For larger 3D-printed props, a high-quality metallic silver, graphite rub, brushed finish, or weathered metal approach is usually more practical.
A slightly less reflective but cleaner finish often looks more professional than a mirror finish with visible flaws.
Lens and Lighting System
The front lens was a major visual feature. The client had previously seen versions with a glass lens, but the glass added weight and created mounting concerns. Since this was a shoulder-mounted prop, every extra gram mattered.
I eventually replaced the glass lens with a lightweight diffused plastic insert. This was a practical design improvement. It reduced the load on the shoulder mount, made the piece safer to wear, and helped soften the LED hotspot.
The lighting goal was not just brightness. The prop needed to glow evenly. A bare LED or direct light source would make the inside look harsh and unfinished. The diffused plastic helped turn the front into a glowing surface instead of a visible internal light.
The final lens solution provided:
- Lower weight than glass.
- Better diffusion.
- Less risk of breakage.
- A softer illuminated appearance.
- Better usability as a wearable cosplay piece.
Electronics Integration
The electronics were kept intentionally simple for reliability. The final piece used an internal LED lighting setup powered by a battery system. The primary goal was to make the front lens glow strongly and consistently.
For a wearable convention prop, reliability matters more than feature overload. Earlier in the process, there was temptation to add more complex effects, but the core function needed to be dependable: turn on, light up, and look good.
The internal layout had to be arranged so that the battery, wiring, and light source fit inside the body without interfering with the lens or mounting structure. The light also needed to be bright enough to show through the diffuser, but not so harsh that it exposed every internal surface.
The Mounting Problem
The hardest engineering problem was not the CAD model, the print, or the paint. It was the mounting.
The first shoulder mounting concept used a harness plate and a strong magnet. The idea was to make the prop removable while keeping the exterior clean. However, the prop only had one magnetic contact point, located on the rear arm.
That created a mechanical problem: a single magnetic contact point behaves like a pivot. Even if the magnet is strong, the prop can still rotate around that point. Because the main body is heavy and sits forward of the mount, gravity pulls the prop down and forward.
In simple terms, the problem was not magnet strength. It was leverage.
The rear arm acted like a lever, and the prop wanted to rotate around the magnet axis.
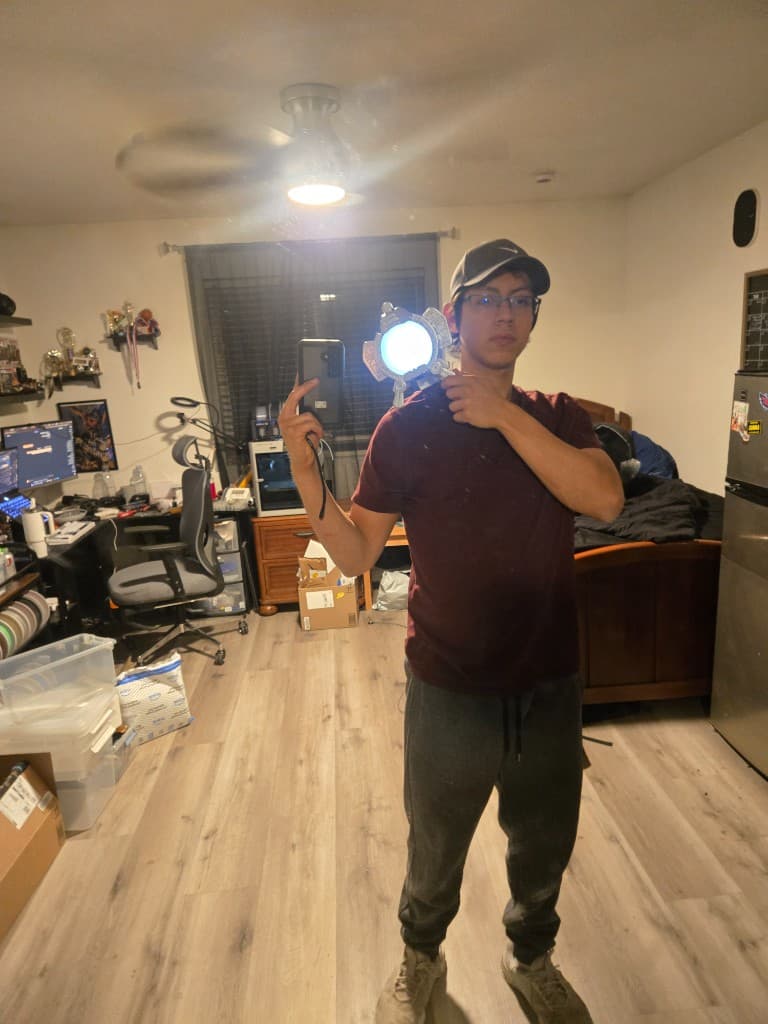
Moving from a Single-Point Mount to a Support System
The solution was to stop treating the magnet as the entire mounting system. Instead, the magnet became only one part of a larger support system.
The final mounting approach used:
- A shoulder harness to distribute weight.
- A support plate to hold the prop upright.
- A rear magnetic connection for positioning.
- Additional printed support geometry to reduce forward tilt.
- Strap tension across the body to help stabilize the load.
The final shoulder support was not just about holding the prop on the shoulder. It was about controlling rotation.
This was the major design shift: the prop did not need a stronger magnet. It needed a better load path.
Final Wearable Test
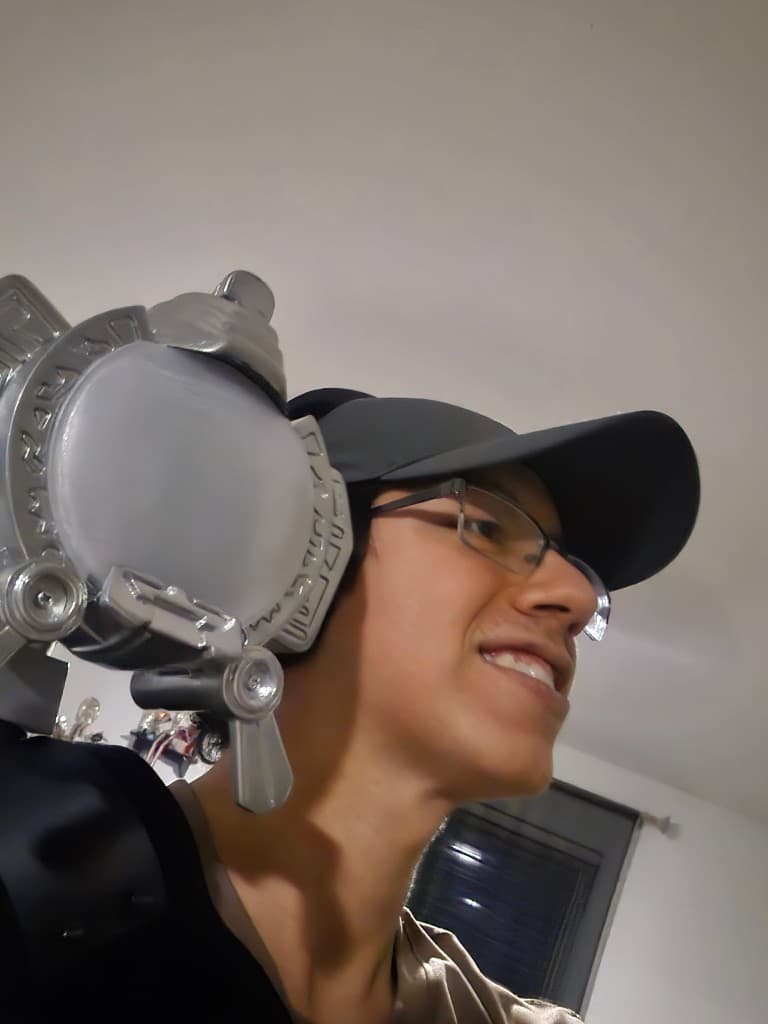
After adding the final shoulder support print, the prop finally behaved like a wearable piece instead of a loose object sitting on a strap. It sat higher, stayed more upright, and looked stable from the front and side.
The final test was simple: wear it, turn it on, check the silhouette, and make sure it did not immediately flop forward.
The final result was not a perfectly weightless shoulder mount. It was still a substantial prop. But the support system made it wearable and presentable, which was the practical goal.
Client Communication and Scope Management
This project also became a lesson in communication. As the build progressed, it became clear that the finishing and mounting were taking longer than originally expected. Instead of shipping something rushed, I communicated the need for extra refinement time.
The client was patient and flexible, which made a huge difference. They cared more about receiving a finished piece they liked than receiving something rushed by an arbitrary early date.
The most important communication decisions were:
- Being transparent when extra time was needed.
- Framing delays around quality improvements.
- Avoiding panic language or self-deprecating comments.
- Sending progress photos only when they helped build confidence.
- Explaining the switch from glass to plastic as a weight and usability improvement.
- Presenting the final shoulder support as a refinement, not a problem.
One important lesson was that clients do not need to hear every internal struggle. They need clear updates, honest decisions, and confidence that the project is moving forward.
Final Client Update
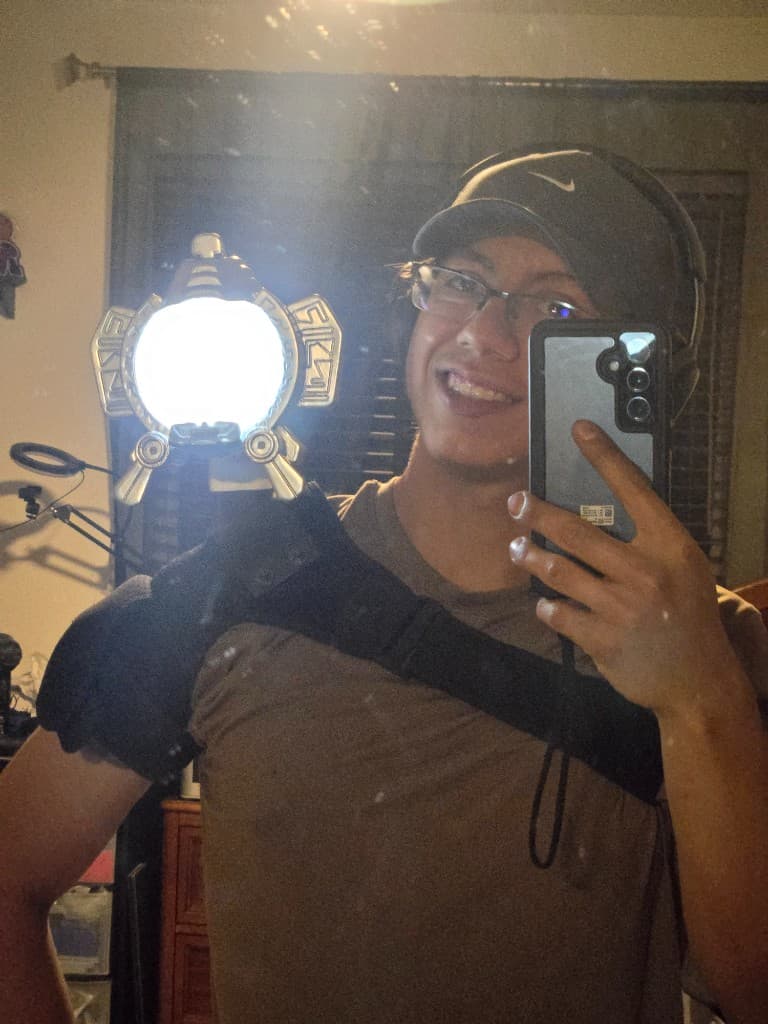
Once the prop was assembled, lit, and wearable, I sent the client several final photos: one cinematic image, one full shoulder view, and one image showing the prop powered on.
This photo set worked well because each image answered a different question:
- The cinematic photo showed the final visual impact.
- The shoulder photo showed scale and wearability.
- The powered-on photo showed that the electronics worked.
The client responded positively and was excited to integrate the piece into their costume. They later left a five-star review, describing it as a fantastic custom cosplay item and saying they could not wait to wear it.

Shipping Issue and Resolution
After shipping, USPS tracking stopped updating for over a week. The package had been accepted, but there were no scans showing movement. The client reached out calmly asking whether it was time to open an investigation.
I submitted a USPS missing mail search request and sent the client a screenshot confirming it. Shortly afterward, the package received a new scan at a regional facility and continued moving.
This became another important project lesson: shipping problems can happen even after the work is complete. The key is to respond quickly, document action, and keep the client updated.
The package eventually arrived safely, and the client was happy with the final result.
Final Result
The completed prop was a wearable, battery-powered, shoulder-mounted cosplay accessory with a metallic silver finish and illuminated diffused front lens. It was designed, printed, finished, assembled, mounted, shipped, and successfully delivered.
The final result included:
- Custom CAD-modeled body.
- 3D-printed PLA construction.
- Metallic silver finish.
- Diffused plastic front lens.
- Internal LED illumination.
- Battery-powered operation.
- Shoulder harness and support system.
- Wearable final presentation.
The build was far more difficult than expected, especially in terms of surface finishing and wearable support. But the final client response and review confirmed that the project succeeded where it mattered.
What I Would Do Differently Next Time
This project taught several lessons that will directly influence future commission work.
Price custom wearable electronics higher
A custom wearable prop with electronics, finishing, and mounting is not a simple print job. It requires design, testing, revisions, assembly, and client communication. Future projects like this should be priced higher to reflect the actual labor and risk.
Avoid promising early ship dates before testing mounting
The shoulder mount should have been treated as a major design requirement from the beginning, not a final accessory. In future wearable props, mounting will be tested earlier in the build.
Do not rely on one attachment point for heavy wearable props
A single magnet or single hard mount may hold the prop in place, but it will not prevent rotation. Heavy shoulder-mounted pieces need multiple contact points, friction surfaces, or strap support.
Use plastic diffusers instead of glass for wearable light-up props
Glass can look nice, but it adds unnecessary weight and breakage risk. A well-designed plastic diffuser is often the better engineering choice.
Choose reliable finishes over fragile finishes
Perfect chrome is extremely difficult on large 3D prints. A clean metallic silver or weathered metal finish is often more durable, more forgiving, and more professional-looking in practice.
Communicate like a professional, not like a panicked maker
Clients need confidence. Honest updates are good, but over-explaining every internal failure can reduce trust. The better approach is to explain decisions clearly and present solutions.
Technical Skills Demonstrated
This project demonstrated several practical skills relevant to design, fabrication, and mechatronics:
- CAD modeling for custom prop fabrication.
- Design for additive manufacturing.
- Mechanical layout and assembly planning.
- Surface preparation and paint finishing.
- LED lighting integration.
- Diffuser and lens design.
- Wearable mounting and load distribution.
- Rapid prototyping and iteration.
- Client communication and project management.
- Troubleshooting shipping and delivery issues.
Portfolio Summary
This project began as a custom cosplay commission and became a full product development exercise. I had to model the form, fabricate the parts, solve electronics integration, manage surface finishing challenges, and engineer a wearable mount that could support the final weight.
The most important lesson was that a successful prop is not just about how it looks on a workbench. It has to function in the context where the client will actually use it. In this case, that meant creating a piece that could sit on the shoulder, glow convincingly, survive handling, and integrate into a costume.
Despite the challenges, the finished prop was delivered successfully and received a five-star review. More importantly, it gave me a much clearer understanding of how to approach future wearable electronics commissions: design the mount early, control scope, price realistically, and choose reliable finishes over fragile ones.